Hey y’all my name is Aaron Halbig and I am a relative novice to music production in general and especially to digital production but I am having a blast taking this course, and hope you are too! Today I will give you a quick tutorial on how to set up the EQ in Ableton live to function like a analog EQ. Let’s jump in!

When you are in Ableton and have a project open, select the channel you wish to equalize. In the image, i’ve selected the channel labeled “Creep Vocals – Nicholas”.

[SCM]actwin,0,0,0,0;Untitled 2* - Live 8Live 84/7/2013 , 11:30:58 PM

Next, in your live device browser, under audio effects, scroll down to the device labeled “EQ Eight” and drag it onto your audio effects panel.

Now select the first filter and, using the options on the bottom of the panel, change the mode to “low cut”.

[SCM]actwin,0,0,0,0;Untitled 2* - Live 8Live 84/7/2013 , 11:36:32 PM

Change the second to “low shelf”. Change the third and fourth to  “bell” and change the fifth to “high cut”.

[SCM]actwin,0,0,0,0;Untitled 2* - Live 8Live 84/7/2013 , 11:39:59 PM

Take note of the Q factor and sweep range of each of your EQ points as noted by Loudon in the videos and adjust accordingly to keep your EQ in the useful range.

Lastly, right click on the equalizer and choose “save as default preset. Now, when you add this EQ to any track, your settings have been saved and you can make the changes needed to your mix for that particular channel.

[SCM]actwin,0,0,0,0;Untitled 2* - Live 8Live 84/7/2013 , 11:54:42 PM

That’s all there is to it, I hope this proved useful and have fun!

Hey guys, this week I’ll have to keep it short and sweet with this hopefully useful tip for automation in ableton Live.

First, automation as defined by ableton: “often, when working with live’s mixer and devices, you will want the controls’ movements to become part of the music. the movement of a control across the song timeline is called automation; a control whose value changes in the course of this timeline is automated. practically all mixer and device controls in live can be automated, including the song tempo. – ableton live user manual”

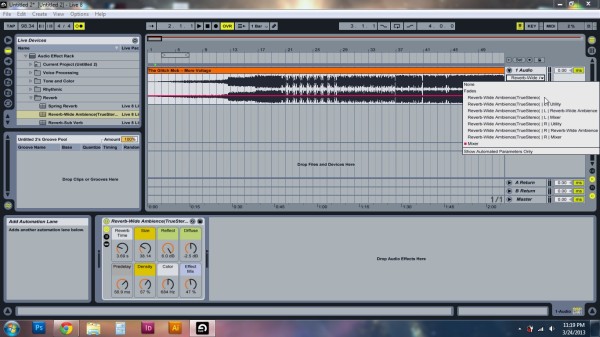
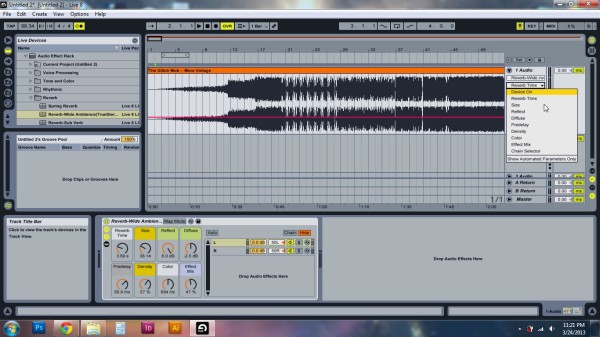
So, this is actually deceptively easy to do in ableton. While in your Arrangement view and with your chosen device, effect, mixer parameter applied to your track, mouse all the way over to the right and select the dropdown called fades/device chooser. In this dropdown, you will see any available devices, effects, etc. I have chosen a reverb and applied it to the track already.

IF

Once you have chosen the parameter (Macro Control) that you want to automate, a red line for that parameter’s envelope will appear across the track, and you may now edit and insert points for automation on the envelope line throughout the track. You may switch back and forth between parameters at will.
Note: Ableton refers to the individual knobs on an effect or mixer as the Macro Control.

IF

I realize this was quick and very dirty, but I hope it was useful, See ya next week!

Hi, My name is Aaron Halbig and his week for lesson two I will be covering the basic editing tasks for Ableton Live. I am using Ableton 8.0.4 on PC so you should be aware that some of these tasks and keys may be executed differently on Mac. You can usually replace CMD with CTRL but that is not always the case. I will also cover these tasks with a bias towards hotkeys and shortcuts, as I like to avoid mousing over to the menu bar and disrupting my workflow, or losing my place. That said, lets jump in!

Trimming

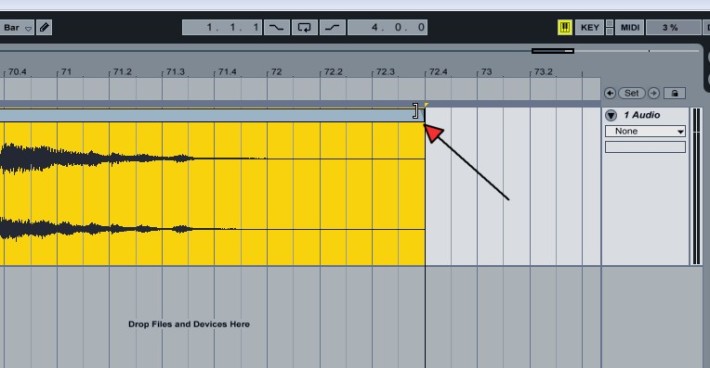
Trimming, or edge editing a clip in Ableton is extremely easy and does not require any hotkeys or shortcuts. Simply move your cursor over the edge of the clip and it will change to a square bracket shape. At this point click and drag to change the bounds of the clip. This can be done at the beginning or end of a clip.

Image

Separate

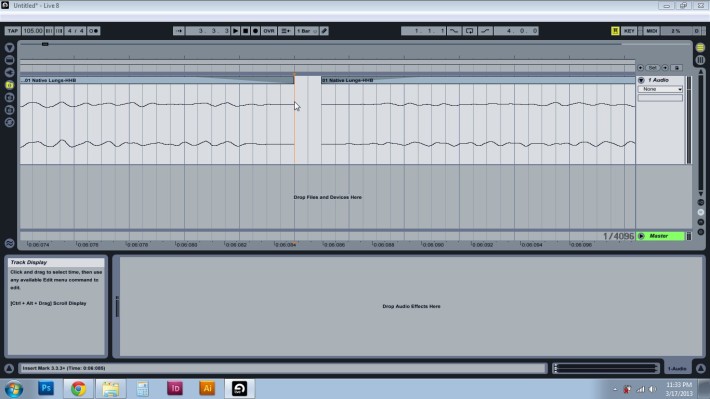
Separating, or cutting a clip is another essential task and can be done using the shortcut CTRL+E. First, go to the area in your clip that you wish to separate at. Click to place your arrangement insert Marker and then press CTRL+E. Your clip is cut right at that point!

Image

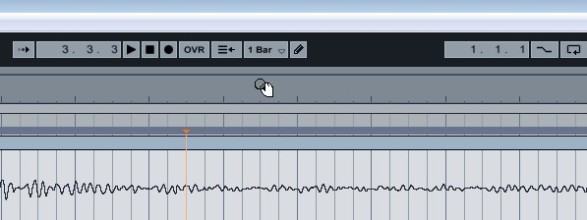
TIP: You can fine tune your selection by zooming into the clip using the (+/-) keys or by clicking and dragging up or down in the Beat Time Ruler, when the cursor looks as pictured below.

Image

Crossfade

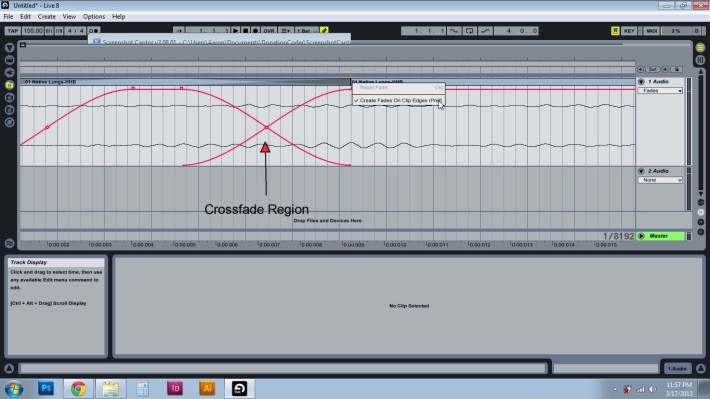
Crossfading is important to keep clips sounding seamless. Often, in ableton, when you use the separate command (CTRL+E) the program will automatically create a crossfade region at that area, and it can be set to auto-create fades at clip edges keeping the sound seamless (this option can be turned off by right clicking in the clip edge and deselecting the option). If you leave this option on, Ableton will automatically create a crossfade when you drag the clips together. I must admit, I am not practiced at this function in Ableton and it seems like the functionality of this feature is somewhat lacking.

Image

Merge

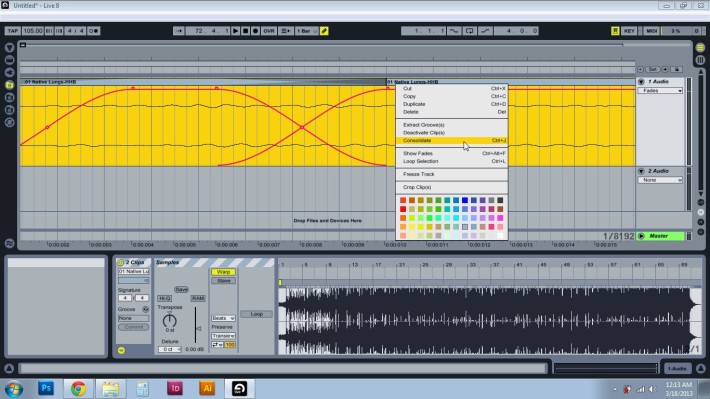
Merging is known in Ableton as Consolidating and should be used with care. Up to this point, the editing we have have done always allows us to go back and undo changes that we have made. Consolidating these changes literally rewrites the track to apply all of the changes, but makes it much easier to view and edit as a whole. To consolidate clips, select the clips you wish to consolidate by holding shift and selecting each clip, then right click to open the menu and select consolidate, or just press CTRL+J.

Image

Grid

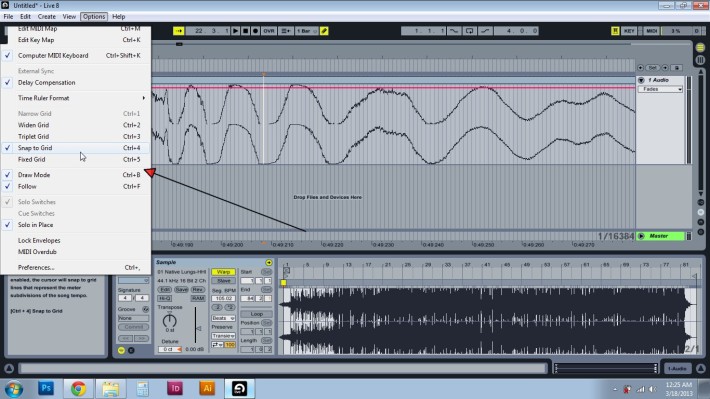
The grid is what allows you to snap sections of audio to perfect points in your track. If you need to jump back and forth between snapping clips to the grid and being able to slide clips freely, your best friend is the CTRL+4 shortcut command. CTRL+4 turns the grid on and off on the fly. Be aware that you can also change the grid width and add triplets markers using shortcuts.

Image

Cycle

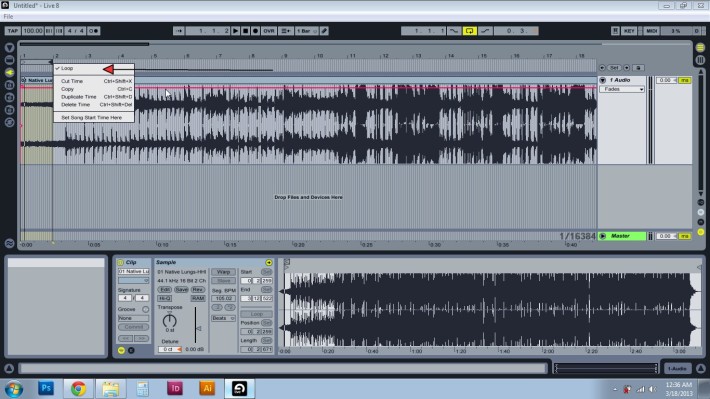
If you would like to loop, or cycle a specific area of your clip, first select the area with the dedicated loop selector just above your audio track in the “scrub area” you may then right-click and set that area to loop. It will now repeat the selection when you press the play button (top of the screen, or SPACEBAR).

Image

Markers

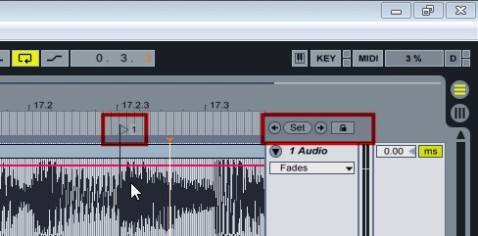
Markers can be used to jump to key points in your clip and can be set with a tool just to the right of your scrub area. You may set markers at any point and also use the arrow buttons on the tool to jump from marker to marker. When the insert point is on a specific marker the add button will change to DEL and will allow you to delete that specific marker. Right-Clicking on a marker will also allow you to set a loop point between the selected marker and the next sequential marker.

Image

Naming and Coloring

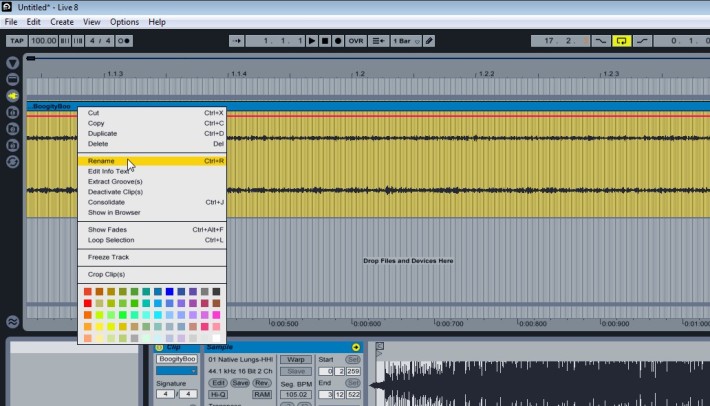
Right-clicking on a clip will allow you to rename that clip and assign it a color in order to better organize your file. Naming is essential so that you don’t mix things up and coloring tracks can give you a quick visual cue when you have a bunch of clips in your clip/device area.

Image

Well, that covers the basics of editing tools in Ableton Live, I hope this was clear and that it helped by giving you shortcuts to some of the tasks!

Following is my word-heavy explanation and teaching assignment for segment one of Intro to Music Production, taught by Loudon Stearns on http://www.coursera.org.

Propagation deals with the way sound moves through a medium, from source to receiver. Sound is represented as a series of waves of pressure traveling through a compressible medium. When these waves of pressure reach a receiver like our ears they are then interpreted into sound by the brain. The most common way we experience sound is through the medium of air. When dealing with sound it is best to think of it in two ways, or represented by two types of waveforms, the transverse and longitudinal wave form. A longitudinal wave is the best way to demonstrate HOW a wave actually works in air by showing compression along a single axis.

Credit: Computermusicresouce.com

Longitudinal wave showing compression in air

However, the most intuitive way to actually view and USE the information is to transcribe a longitudinal wave into a transverse wave that allows us to view amplitude and frequency over time.

Credit: computermusicresource.com

A Longitudinal wave

Some effects in the DAW that affect propagation are delays and reverbs. This leads into the next portion of this lesson: Amplitude.

Amplitude can be thought of as the strength or power of a signal wave, or to what degree it rarefies or expands the air. The amplitude is represented by the height of the waveform.

Credit: computermusicresource.com

Amplitude is the height of the peaks of a waveform.

We interpret this information as loudness or quietness. It is possible to encounter some confusion when MEASURING amplitude, due to the fact that we can measure it both in the computer AND in air. The common unit of measure for amplitude is decibels (or dB). When we are measuring in the air we are referring to decibels of Sound Pressure Level (or dBSPL) and in the computer we are measuring decibels at Full Scale (or dBFS). These numbers are quite different from each other due to the fact that decibels are a RELATIVE measure. When measuring in air, we start at 0dBSPL and then increase from that point to the loudest thing we can hear comfortably, or the Threshold of Pain. When measuring in the computer, it is necessary to set zero as the LOUDEST thing that can be represented by the computer and then decrease from that point. Often, decibels in the computer will be represented by negative numbers. Due to this difference in measuring, it is necessary to know whether you are dealing with decibels of sound pressure level (in air) or decibels at full-scale (in the computer). When working in your particular DAW, there will be a number of dynamic plug-ins (you may or may not already be familiar with these) that control amplitude of signal over time. These include: expanders, gates, compressors and limiters. Another point where amplitude comes into play is when looking at the Dynamic range of a piece of gear like a microphone. A microphones dynamic range is the range of decibels in which it will reproduce sound correctly. There are added variables when dealing with a piece of gear and its limitations including: noise floor and distortion. Noise floor is where the quietest sound will be overtaken by ambient noise and distortion happens when a very loud sound cannot be accurately reproduced by the mic. Dynamic range also represents the range of loudness across an entire composition.If you are math-minded or interested in theory, you can do further research on how logarithms are used to represent intervals and semitones although this has more to do with frequency ratio. Logarithms are also instrumental in describing even-temperament for tuning and playing chords although I must admit my knowledge in this area is lacking to the point of non-existence and I am only aware of these as nebulous concepts.

Moving on to Frequency is when things get really fun. Frequency is related to pitch but is used to describe how a computer would measure a wave, and this is measured in Hertz. 1 Hertz translates into one vibration per second. PITCH is related to frequency, but is what the human ear detects.

Image credit: physicsclassroom.com

Image shows differing frequencies.

In music, we rarely encounter pure frequencies, more often we encounter sounds from instruments that have energy across multiple frequencies, leading to the distinct sounds of those specific instruments.In the course, we learned that frequency is closely tied to Timbre or the spectrum of frequencies present in a single instruments sounds.

When we talk about fequency, it is important to know the human range of hearing. The human range of hearing is generally accepted to be from 20 Hertz to 20,000 Hertz (although, in practice we find that 18,000 Hertz is a more reasonably detectable upper-end). Now that we have introduced frequency into the equation, there are a whole host of interesting topics that can be discussed. Loudon Stearns introduce the terms phantom Fundamental and Masking at the end of the talk on Frequency and I will provide my best summary of those concepts here. Both of these concepts are part of what we refer to as psochoacoustics or the study of how humans perceive sound. Phantom fundamentals are harmonic series that give human hearing the PERCEPTION that the base frequency is present, without that frequency actually being present. In one example, a high-pass filter might be used to remove frequencies below a sound system’s capability and reproduce them at a higher harmonic. Masking is what happens when one sound is affected or overpowered by another sounds presence. This topic is incredibly complex and I won’t be able to describe in detail, but masking heavily affects how humans percieve sound, especially within varied sound environments.

Timbre is the collection of sound in multiple frequencies that makes up the specific sounds of varied instruments. This is what differentiates musical instruments from each other, as two instruments playing the same note at the same loudness will sound distinctly different. Timbre may also be referred to as the color or tone quality of an instrument. one humorous definition is: “the psychoacoustician’s multidimensional waste-basket category for everything that cannot be labeled pitch or loudness”(McAdams and Bregman 1979, 34; cf. Dixon Ward 1965, 55 and Tobias 1970, 409).The characteristics of each instrument allows us to identify them separately, even in ensemble settings, where masking may occur and allows us to pair instruments that complement each other or fine tune the attributes of music in mixing to make them better complement each other.


So there it is! I hope you enjoyed reading it and look forward to learning more about music production in the coming weeks!


Maybe its the fact that I’ve been doing research on restoring axes and other outdoor related activities or simply that it’s finally summer and this season just seems to get in my bones, but I’ve had this wistful feeling lately. And maybe it’s too simple to call it a feeling, so let’s call it a collection of memories set to music. The memories lie themselves out in nonlinear fashion, jumping around like scenes from an old 8mm camera, badly seamed together.

My grandpas old purple-brown GMC truck and its saddle-blanket seat cover rough under my fingers, rising before the sun to get the jump on hungry fish in Colorado lakes, the satisfying crack of a log split with a single blow of a well-honed axe, conversational coyotes singing me to sleep tucked safe into my sleeping bag, total immersion in the microcosm of campfires, fishing lures, bugs, pine needles, sticks, stones and dirt.

Lately I’ve stumbled upon a collection of musicians and songs that make a great soundtrack to this poorly edited collection of memories and set in me a desire to get out into the summer and form a few more of them.

Look and listen to these beautifully shot and edited songs (by Kevin Ihle) from: The Haunted Windchimes, McDougall, and Willy Tea Taylor.


Happy summer!

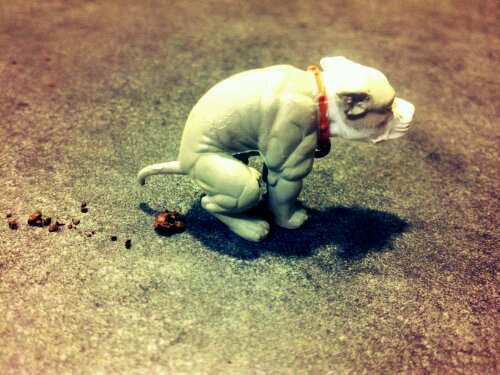
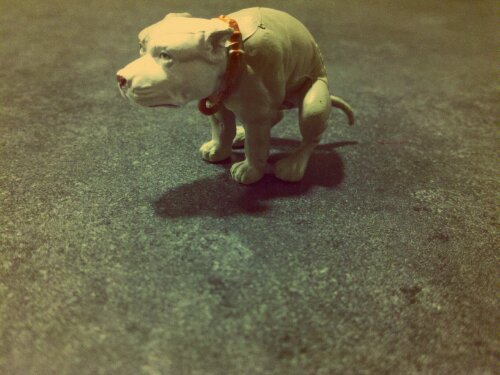
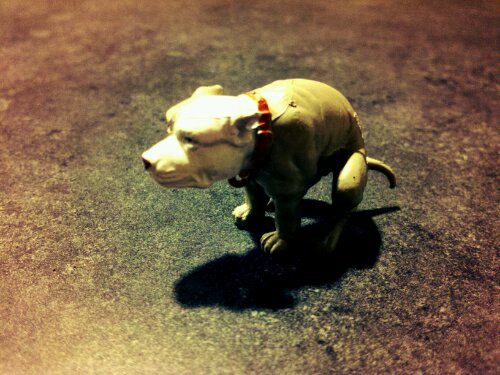
One fortuitous day, we were attempting to appease our small child by purchasing a toy from the quarter machine while waiting in line at the rather large mexican market in our neighborhood. Here is the thing, at the quarter machine we expected some cheap toy to pop out that would eventually break and be forgotten, but we got more than that. Oh, so much more. Instead we gained a friend, a sage advisor in time of need, and a joy to all around. We gained Pooping Dog.

image

When that (roughly) anatomically correct pooping dog emerged from its plastic shell and entered our life, we gained more than fine delicate plastic craftsmanship, (they even included a 1/64 scale penis!) we gained a family member.

image

Pooping Dog now holds a place of high esteem in our family, and that place is right on the kitchen bar, where he can be counted on to ensure you had a great day!

image

With the onset of summer and the resultant hot, windy weather making our brains and other parts all sticky, my good friend Logan and I decided it would behoove us to finally go fishing. Yes, we would get out and enjoy the beautiful weather, we would free ourselves from town for a while and go catch us some good ol’ fashioned fish, we would…. crap, we would have to buy fishing permits… and I would have to find a pole, and… after a day of hemming and hawing and weighing the benefits of one course of action over another, we finally decided we’d be better off just going camping for a little while and not hassle with fishing.

We packed bags and decided to make trails for the Jemez Mountains. After roughly a thousand stops at various stores for things like dried food, beef jerky (dried food?), gas and technical outer wear, we finally found ourselves leaving town behind and heading up the road to Jemez.

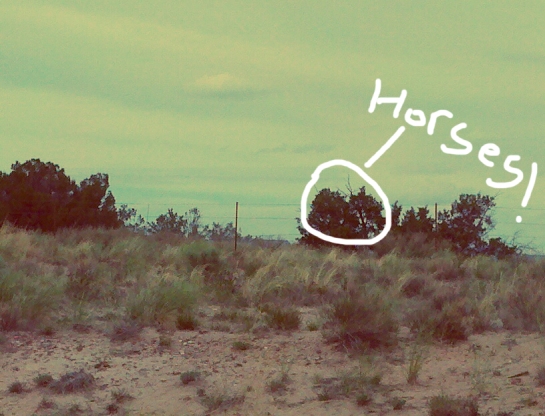
On the stretch of Highway 550 leading from Bernalillo to Jemez, we drove by a small herd of wild horses grazing near a section of ubiquitous highway fence. I had decided before leaving Albuquerque that I would take as many pictures as possible to document the trip, so in an attempt to uphold this promise to myself, I decided I must take pictures of these wild horses. One snap decision and two well-timed u-turns later, we pulled over on the shoulder near the wild horses. This was great! A perfect first shot to start the trip off, with the horses all eating grass and doing other horse-y things. The only problem was that the horses weren’t looking at me. Dangit, why wouldn’t they cooperate? Faced with this dilemma, I did what every movie I have ever seen has educated me to do when luring skittish horses into a false sense of security. I did that silly little click-click-clicky noise that you make with your tongue and your cheek. Click-click-click! Click-click-click! I was sure that the horses would now look at me and chew contentedly on their grasses while I took a beautiful picture, and some ethereal glow would fall upon the scene and I would drive away cackling with the first magical picture of many stored securely away. Well, the horses looked at me but contented was not their manner. Instead they looked at me with a sort of wild craziness in their eyes, almost as if to say “WHO HAS the GUN?!” My maniacal misguided clicking had set off some primal response in the horses, warning them that they were in fact about to be devoured alive by some clicking beast and instructed them to run as if their lives depended on it. And run they did.

Faced with my amazing first shot running off into the desert, I started clicking and pressing the shutter frantically in an attempt to capture anything, even the horses behinds as they ran away. This is the best shot I got.

They were right there, dude.

Instead of driving off triumphantly, we left empty-handed as I laughed like a fool at my abortive attempt to photograph the horses.

The rest of the trip saw us hiking through some new country due to the Las Conchas trail being recently closed to camping. This closure is a direct result of the beating the area has taken from the recent fire and is an attempt to allow the area to rebound and regrow. We camped downriver from the Las Conchas trail head, in an area that turned out to be just as beautiful, if much harder to access.

I kept my vow to take as many pictures as possible, and the area was perfect for camping. I fell asleep to the sound of hunting owls hooting and we left in the morning to the sound of some weekend hikers hooting up the valley behind us.


If I’m ever out driving and I see another herd of wild horses gathered near a fence, I’m going to just keep driving. Or I might give them a drive-by clicking.